Tuesday, March 13, 2012
To brine or not to brine, that is the question
Chicken before a 2.5 hour slow cook
Bring the heat and DON’T TOUCH IT!!!!
When you sear meat/chicken/fish, it caramelizes the sugars and browns the meat which although it doesn’t help retain juices, does add flavor.
Step 1: Make sure your grill is clean
Step 2: Take the meat out of the fridge and let it come to room temperature
Step 3: Fill your chimney and light it up
Step 4: Once the charcoal begins to turn white, pour the charcoal on one side of the grill and get the grill super hot.
Step 5: Brush the meat with olive oil and add a liberal amount of spice rub (fresh cracked black pepper, kosher salt, cumin, cayenne).
Step 6: Place the steak directly on top of the side with the coals at a 45 degree angle for 3 minutes. Do not cover the grill!! After 3 minutes turn the steak 45 degrees on the same side to create checkered grill marks on the meat. Next turn over the meat onto a 45 degree angle and repeat the searing on the opposite side. After you have completed searing the meat on both sides move the meat to the side of the grill with no charcoal on it.

Step 5: Check the meat for doneness. There are a couple of different ways to test if the meat is done. You can use a thermometer, but poking a hole in the meat has a habit of letting out juices that you really don’t want to lose. One other way to check for doneness is by using the finger test method as seen here:
If your meat needs more time, just put the cover on and let temperature come up slowly using the indirect method of cooking. Just remember that every time you take the cover off the grill, you are releasing internal heat and it will take time for the temperature of the grill to come back up.
Step 6: Let the meat rest! Once you take the meat off the grill, let it rest on a plate with a tented piece of aluminum foil for 7-10 minutes.
Monday, March 12, 2012
It's all about the rub.....
Base Spice: Cumin
The Rest:
Cayenne Pepper
Fresh Ground Black Pepper
Kosher Salt
Onion Powder
Garlic Powder
Smoked Paprika
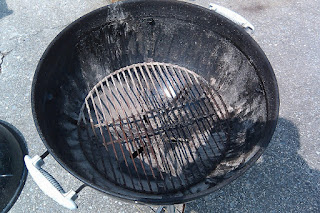
You know it's time to clean the grill
...when you find yourself daydreaming about grilling dinner. The weather is getting warmer (not that it really got that
cold this winter to begin with) and my thoughts are returning to heading
outside and firing up the grill. While most people out there have been grilling
all winter on their gas/propane grills, I have been waiting for that outside
ambient temperature to hit a constant 55 degrees Fahrenheit at night after all the kids are asleep and I can finally get to the business of grilling dinner. Why is outside temperature
important you ask? I grill on a Weber One Touch Gold kettle grill which means
that I utilize direct and indirect heat when grilling. When the inside
temperature of the grill has to compete with the outside temperature, it is
hard to maintain an even inside temperature without having to keep opening the
lid (and lose all that heat) to add more charcoal.
I prefer to use charcoal because I can see and taste the difference with the food. Some say that it isn’t real BBQ unless you use
charcoal. I can also say from experience that there are definite differences in what you
can make and how you can make it when it comes to a propane grill. My advice is that when you
grill with charcoal, it is important to avoid using lighter fluid to get your
charcoal going. I personally recommend a chimney and leftover newspaper (my kind of
recycling).
What kind of grill do you use?
If you use charcoal, how do you light it?
Subscribe to:
Posts (Atom)


